
Green House: 4 Big Changes
July 12, 2016
Hi everyone. Big changes are happening in our little green house!
I am finally making good on my promise to tell you more about the plans for the interior of our flip! This is long overdue!
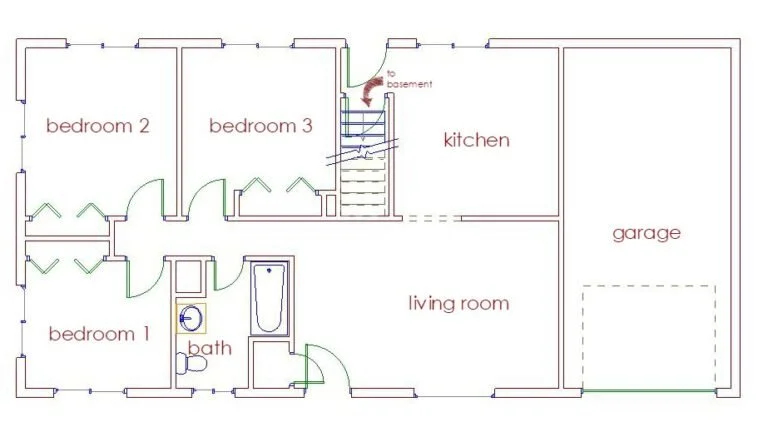
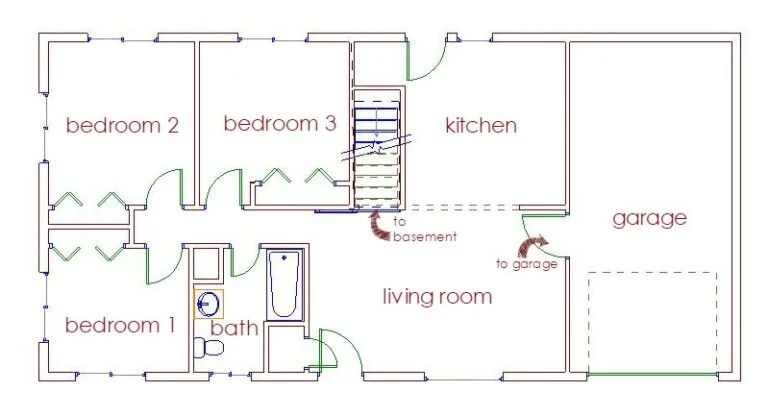
I know, I gave you some glimpses into the house in this post, and shared the plan for the exterior here. But I have been stalling on getting a floor plan drawn out for you guys. So here it is: the floor plan at time of purchase:

As you can see, there’s nothing fancy going on here. Pretty simple layout with only a few major changes needed. In fact, we narrowed it down to four. Four big things.
BIG CHANGE #1:
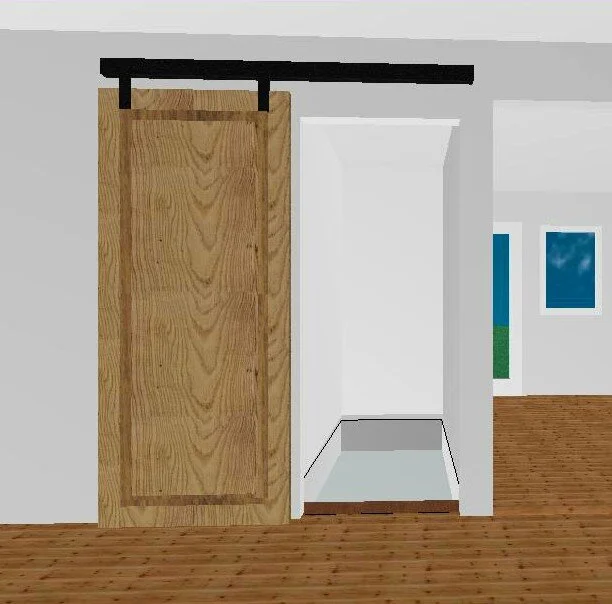
Of course the obvious change: enlarge the opening between the living room and kitchen. When we bought the house the wall looked like this:

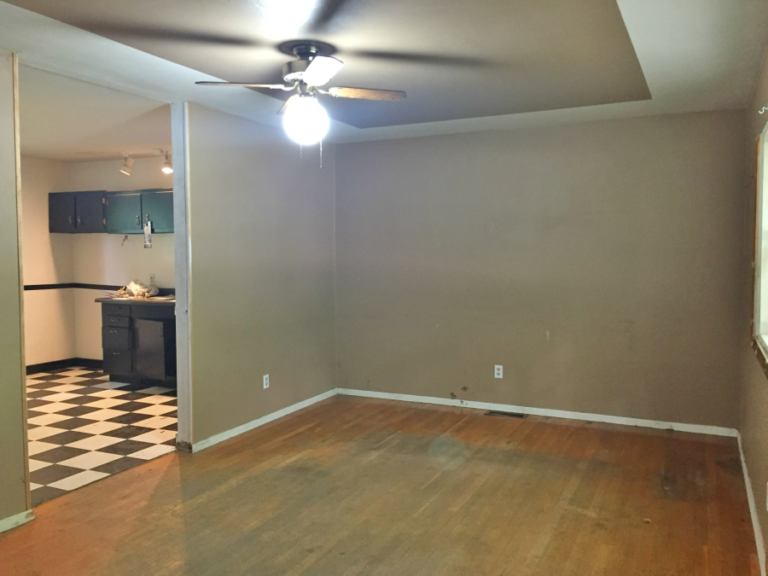
We have since opened it up so it currently looks like this:

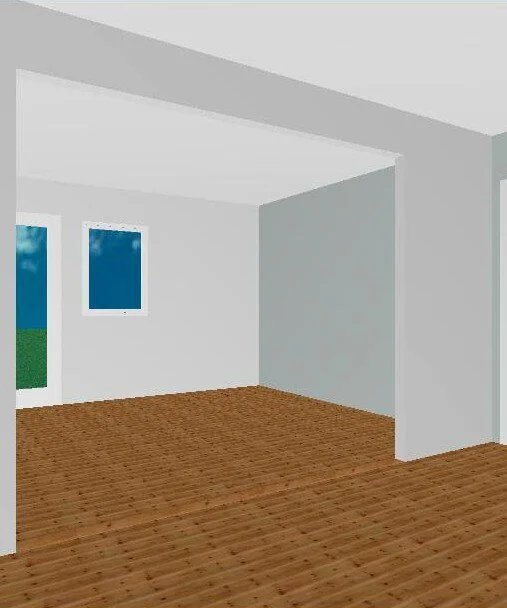
When it’s finished it will look something like this:
Challenges with this change (so far): We don’t really have any except for one really odd thing we found. You see in the original photo how the pre-existing opening goes to the ceiling? Well, when we opened the ceiling we found the “support” for that opening was a series of metal straps wrapping around the rafter beams and UP to a 4×4 that was resting on TOP of the rafters. How that can help support the load of the house I do not know. What the what?
BIG CHANGE #2:
Did you spot what was obviously missing from this house when you looked at the floor plan? Something everyone wants when they have an ATTACHED GARAGE? Yep, you saw that right. There was no door from the garage into the house. When we walked around the house I said that had to change and both guys (hubby and realtor) said (and I’m paraphrasing here): “ah, nah, who cares, that’s no big deal”. And I was all like: no big deal?! When the single woman who buys it wants to close the garage before getting out so she feels safe at night? When the mom with a run-away toddler wants to shut the garage door so her kid doesn’t run toward the road while she gets the baby out? When the cute elderly couple slip on the ice going up the front steps because there was no door inside the garage? When it’s -10 degrees and you havent had time to shovel? No big deal??? Oh. said the men. Sure, we see your point.
But I digress.
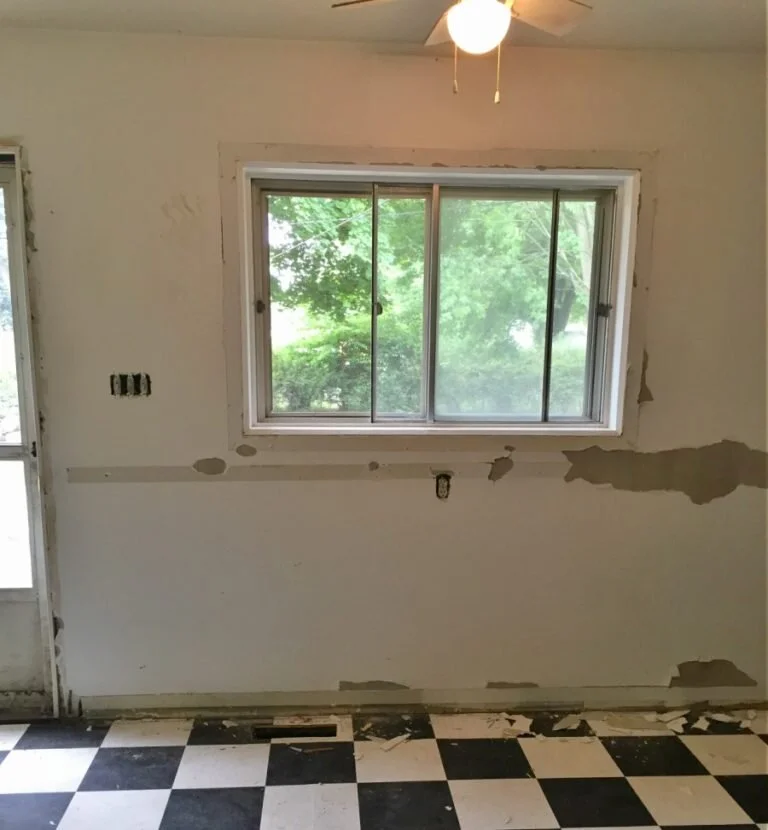
Anyway, once it was determined that we would add a door into the garage we had to decide where it would go. I really didn’t want it to steal kitchen space so I decided we should put it in the living room. In fact, we’re going to re-drywall a little bit of that wall we just ripped out so the door can open up against a wall. So the living room looked like this when we bought it:
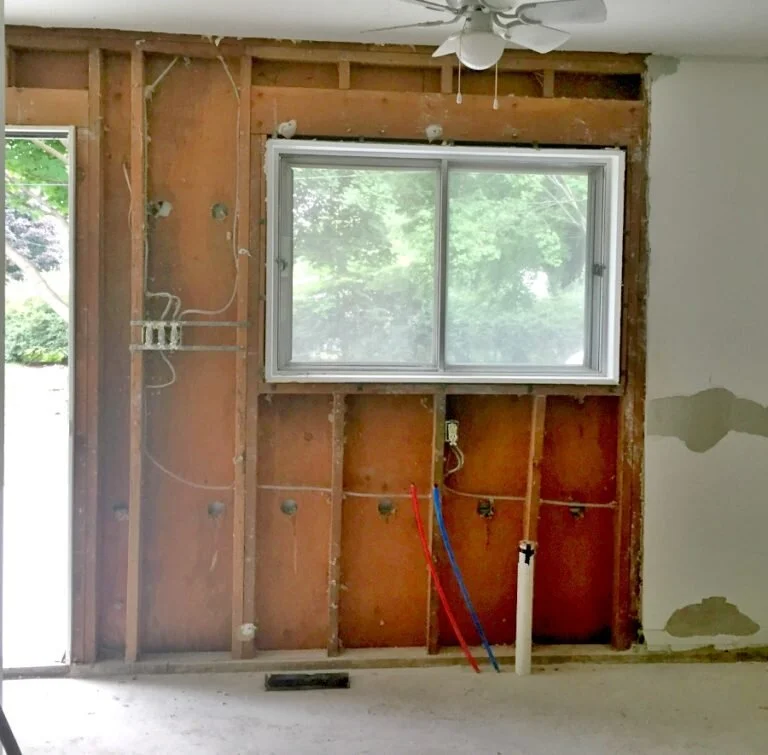
And it looks like this right now:

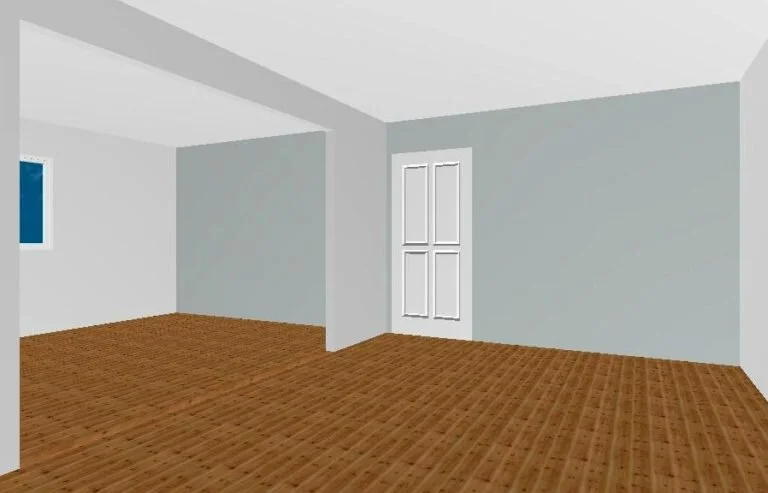
And when it’s finished it will look something like this:
Challenges with this change (so far): the garage is not that wide – it’s a single car garage. And to get up and into the house we will need to add a step in the garage. So to put a step right out there in the middle of the garage wall…is that a good idea? I don’t know, but the city inspector said we’re ok to do it. So we decided to do it. Then as the new garage door was being installed we realized because the door isn’t that far from the front of the house the garage door rail MIGHT run right across the door (thereby creating a situation where someone tall would run into it when leaving the house). And as you can see in change three, we are trying to avoid that particular issue. So we did a little exploratory cutting into the wall and found that we will just make it and have full clearance in front of the door. Phew!
BIG CHANGE #3:
This is one you can’t really see in a listing photo. In fact, you can’t see it until it hits you in the face – literally. And then you see stars. And a possible concussion diagnosis in the E.R. What am I referring to? It’s a problem with the last two steps on the staircase leading into the basement. Because the stairs head from the back of the house toward the center, they end right at a steel I-Beam. Anyone taller than 5’ 2” is bang out of luck. This problem, ironically, is one of the few things the guys both immediately said we needed to somehow fix (maybe because they’re both over 5’ 2”, much to their relief I am sure). We were considering trying to add a landing near the bottom and then turn the stairs, but the furnace is right there so it wouldn’t work so well unless we move the furnace. Then Bruce had the brilliant idea to just flip the stairs! So smart, right? So they’ll start up at the living room and end down near the exterior wall where there is plenty of headroom.
So when we bought it the stairs looked like this:

And now the wall is all opened up, the sloped ceiling is gone, and the future view of the staircase door looks like this:


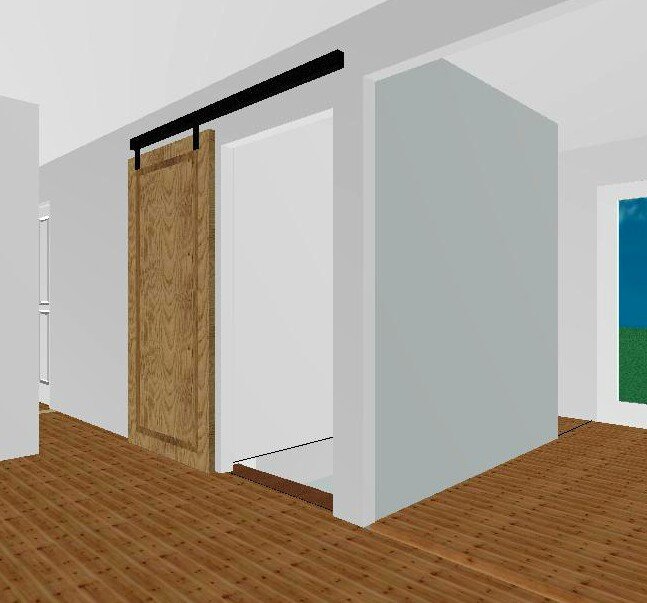
And when it’s done it will look something like this:
Challenges with this change (so far): Well, if you know anything about doing a project on an old house you’ll know basically nothing in an old home meets NEW building code standards. If you don’t change it, you can keep it in the house as a “pre-existing” thing. But as soon as you change something, you have to make it meet code for NEW building. In general this is good. Of course we want new plumbing and electrical to meet current code! But what it meant for the staircase was that we can’t just take it off, rotate it 90 degrees and put it back on. We have to have a 36” wide opening, we have to have 36” square space at the bottom of the stairs, we have to have stairs that are no more than 8.25” tall and 10” deep, etc etc. So the inspector kindly stopped by to tell us if it was even possible to flip the stairs. The answer: yes! Everything checked out…except the staircase itself. The treads are 9 ½“ deep, not 10”. So we’ll have to build a new staircase from scratch. Which isn’t a bad thing for the new owners, but is a little intimidating since we haven’t done that before.
And finally…
BIG CHANGE #4:
With the staircase flipped, there was no need for the door into the backyard to be stuck back in the corner. In fact, we realized we could utilize that corner as a pantry if the door wasn’t in the way. So we decided to slide the door over about 3’ from the corner. This of course means that the window on the back wall won’t work, so we’ll be switching it out for a smaller window. To compensate for that loss of light we spent extra for a steel exterior door with a full glass panel. We will not be handling all of this particular change ourselves. The window guys are also excellent framers and will be installing the new door when they install the window (since it will require a new header across the whole thing).
So the original back wall of the kitchen looked like this:
And now it looks like this:
And when the work is done it will look something like this:

Challenges with this (so far): none! We will have to get electrical moved and the air conditioner vent moved as well, but those don’t feel like major issues.
If you prefer the birds eye view of the whole thing, here’s the original floor plan you saw up at the top of this post and another just below it that shows the changes we plan to make:
And there you have it: four big changes.

Of course there are also lots of other changes that will go on inside: new electrical, new & repaired plumbing, new windows, new flooring in some places, all new doors and trim, new lighting, skim coating the walls, new bathroom fixtures, and a new kitchen (ok, that one is worthy of a separate post). We have filled an entire dumpster with the old and just last week it was hauled away – making room on the driveway and signaling to me that the fun part of these plans is getting closer!
