Green House: Bathroom
November 30, 2016
Well hello again, friends.
If you’ve read the little bio to the right of this post, you know Bruce and I are teachers. And school started again this fall, as it’s prone to do, and here we are. Three MONTHS since I last posted, and with limited progress to boot. We didn’t realize how difficult it would be to get to the house for work once the real jobs kicked in. So, I’m back to share the bathroom progress with you today, but I sure wish I had more to share. This, in fact, is the only room that is even close to being done. Amazingly, we ripped out the toilet and vanity (and floor, and lighting, and trim, and doors….) two five months ago, and between other projects we’ve been chipping away at the bathroom since then. It actually didn’t LOOK that bad before we ripped everything out, but it was gross. I won’t ruin this post with the details. Here’s the bathroom when we bought the house:
Long, long ago (you know, summer) this room got a new window, Bruce resized the medicine cabinet opening, patched the walls, and added a much-needed vent fan. Then we painted the walls Sherwin William’s Sea Salt:
For the floor, we chose Stainmaster Peel and Stick Vinyl Tile. We didn’t want to put ceramic tile in here because we would have needed to add a layer of cement board. That plus the thickness of the tile would have really raised our floor to a height that wouldn’t have worked well with the wood floors in the hallway. We were a little hesitant about something labeled “peel and stick” but were assured that if we prepped our floor properly it would adhere firmly. To prep the floor, we added a new thin ¼” subfloor (the old subfloor was sticky and uneven from glue residue) and rolled on a surface primer.
Then we started sticking down tiles. We started at the door and worked toward the back. Bruce loved that he could crawl right on top of the tiles after setting them in place (something you wouldn’t want to do with a standard tile installation). Just to ensure even spacing we used some ¼” tile spacers that we already had from another project. I cut the tiles with a simple box cutter.
Later Bruce added grout. This product was one we’d never tried before, but it’s marketed to pair with these vinyl tiles. It’s a little different than a concrete based grout. Instead of a powdered product that you have to mix with water it’s a premixed substance that’s more of a polymer (Bruce’s words) – in non-scientist terms it’s a bit stickier. I wondered if it might be difficult to use, but it spread like regular grout and cleaned up easily with water.
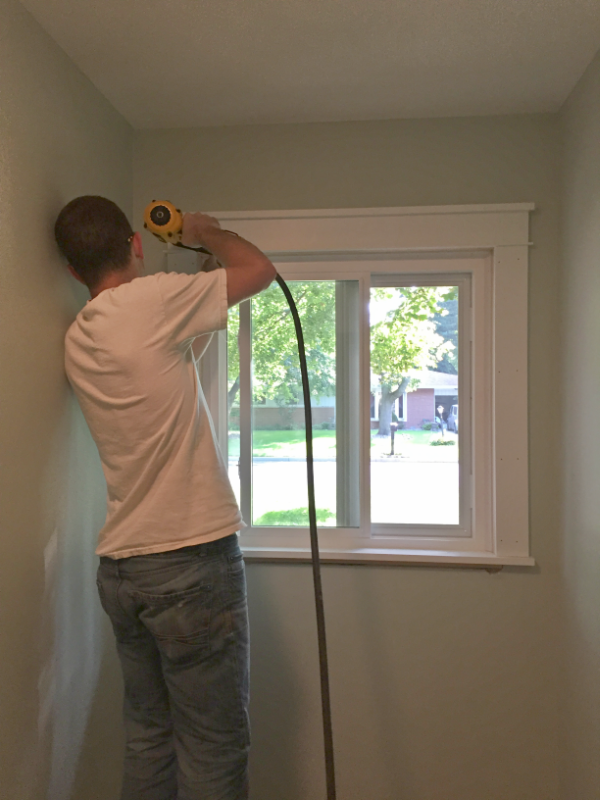
With the floor done we installed two new doors (entrance and linen closet) and we got going on trim. I decided to follow this trim plan to give the window a little more visual appeal. It cost a bit more since there were a few extra pieces involved, but it sure looks good!
Just a side note: once white trim is installed you’re not done with it. Oh no. There are nail holes to fill (then you wait for those to dry so you can sand them down). There is caulking to do on every seam (then you wait for that to dry too). Then the trim needs a final top coat to cover those sanded nail plugs and the wall needs a final top coat to cover the rest of the caulk. Basically, you want to cover all caulk completely with paint – otherwise it creates a nice little dust grabbing line and will look dirty fast. But back to the progress….
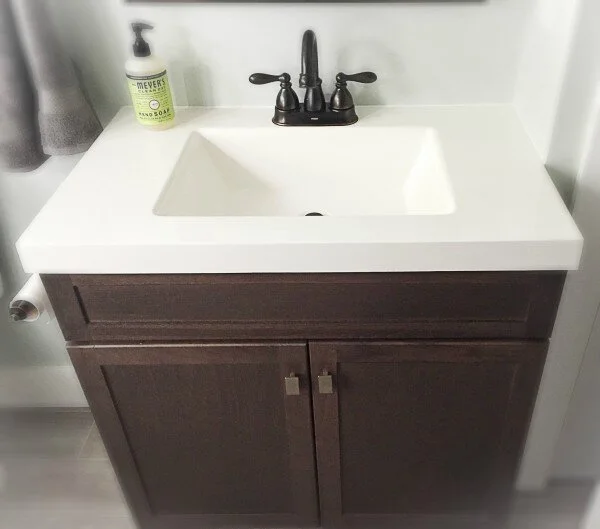
Next step in the bathroom was to install the vanity. We went with this from Lowes:
We got the countertop on and sealed into place, then worked on the faucet. The first one I bought looked great until I got it into the house and realized it was too tall; the door of the medicine cabinet wouldn’t have been able to swing open….whoops. Fortunately, I realized it before installation and took it back. I swapped it out for this one (normally $145 but on clearance at Menards for $69!):
We installed the toilet (cheering! applause!!) and popped in the medicine cabinet (see, gotta have faucet clearance there):
Finally, we added the towel rods and toilet paper holder and installed the light over the vanity.
I’d like to tell you now it just needs to be staged with some pretty towels and fresh flowers…but not quite. We still need to install a window treatment for privacy, clean the tub up (it was our paintbrush washing station all summer), add a shower curtain, and add shelving in the bathroom linen closet. But regardless, it is progress:


